In an ideal world, when deploying your website to an Azure App Service you should be using Continuous Integration (CI) and Continuous Deployment (CD) tools like TeamCity, Octopus Deploy or Azure DevOps. However if you are running a small site or just want to quickly deploy to an Azure App Service then I’d suggest using Visual Studio Publish.
Below I’ll take you through the steps to set-up Visual Studio Publish so you can quickly deploy to your Azure App Service in just a few clicks.
Step 1: Download Publish Profile
First login to Azure and navigate to your Azure App Service that you want to deploy to, then click the Get publish profile. This will download the Azure App Service’s *.PublishSettings file which we’ll use a little bit later.

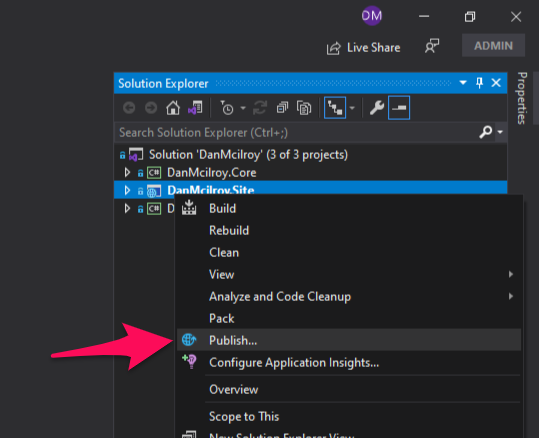
Step 2: Open Publish Dialog in Visual Studio
Next in Visual Studio right click your site project and click Publish…
Step 3: Create New Publish Profile
This will bring up the Publish dialog, here click the + New button.

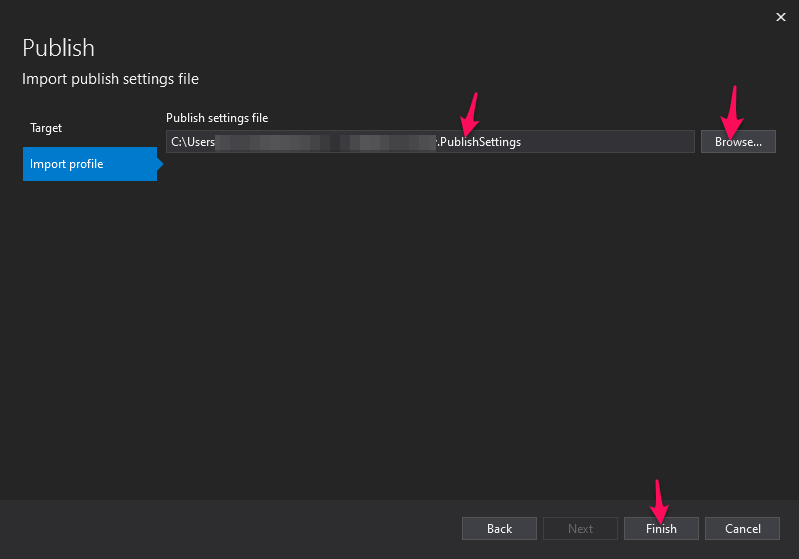
Step 4: Import Profile
Next click Import Profile - Import your publish settings to deploy your app, then hit Next.

Step 5: Select PublishSettings File
Here we click Browse… and select the *.PublishSettings file we downloaded earlier and hit Finish.
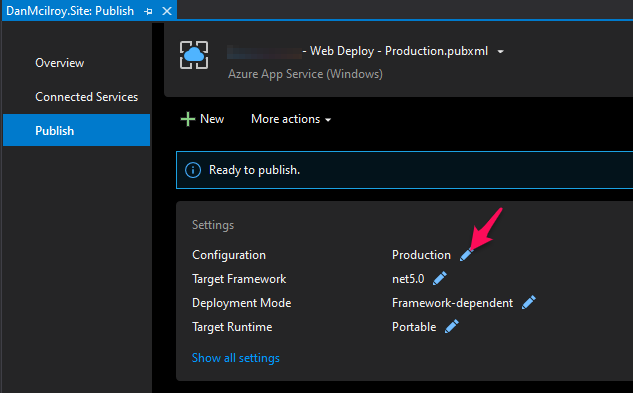
Step 6: Review and Configure Settings
Web Deploy is now added, however double check the Settings and click the Pencil to modify any settings required.
Step 7: Deploy
Web Deploy is now set-up to deploy to your Azure App Service and you are ready to deploy. To deploy simply click the Publish button.
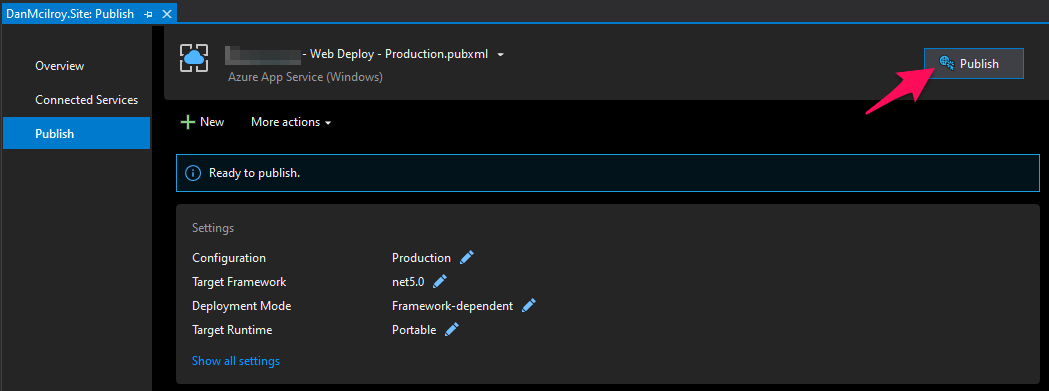
That’s it! This will run scripts in the Output window and when it has finished it will load up your Azure App Service URL in a browser.